
Mar
19
New article on preparing images and how to use the High Pass sharpen filter. Hope you enjoy the new format.
Regards,
Matt Hickey
Mar
03
Up until recently, I’ve just been tinkering with Photoshop and not really knowing what I want to achieve from it when editing an image. My style is changing and I’m now starting to think more about my images and “the look” I’m going for when taking the photographs. I guess it’s something you develop over time with your shooting skills, lighting knowledge, editing work, etc. Learning and experimenting is what I’ve found is making me a better photographer.
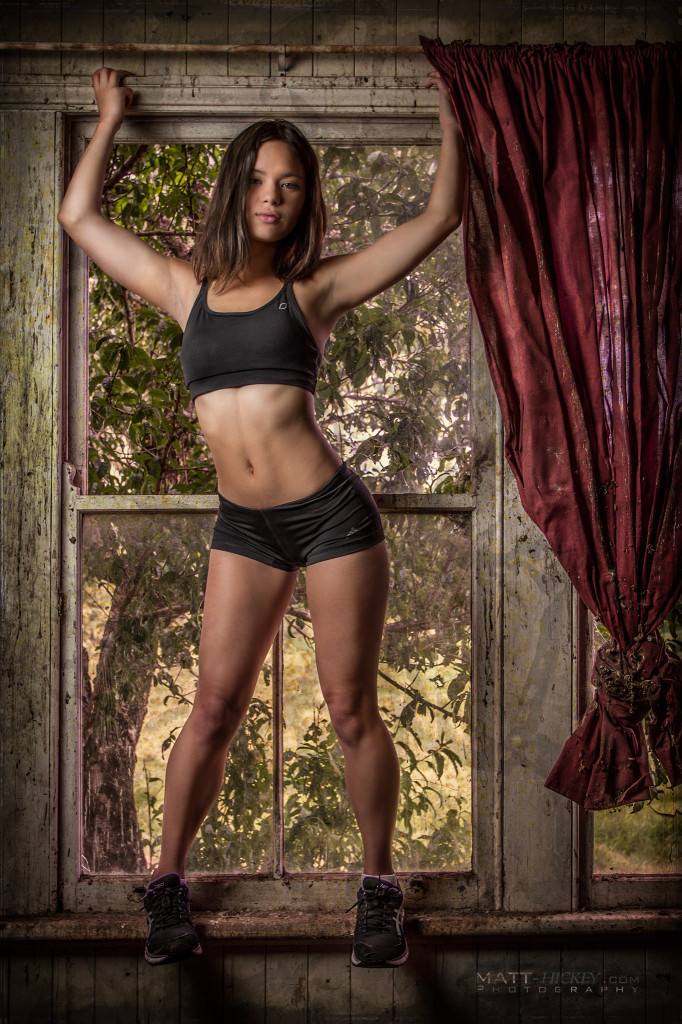
A recent photo shoot with Amber really made everything come together and resulted in a strong image which I’m proud of. I thought about the shoot, weeks in advance. I studied locations and performed lighting tests. It also came together in my post processing work because I had pre-visualised the end result. It was just a matter of using Photoshop in a way to get the result I wanted. Here’s my journey on how I got there with this slightly over the top, stylised fashion image.
Thoughts:
Set in an abandoned house. Very grungy and dirty. I want to bring this look into the final image. Two light sources in this shot, 1) an octo-box set 45 degrees left of the subject, and 2) the light coming in from the window. I used a strobe so I could lower the ambient light and reduce the amount of light flowing in from the window.
I set a green gel onto the strobe in the soft-box and then colour balanced my White Balance settings on the camera to this light. This ensured that any light falling onto the subject would be correct, but any other light would give off a magenta hue (opposites in the colour space). This would give a mysterious undertone to the image… I hoped.
Abandoned House
Having a knowledge of Photoshop definitely helps. Being able to visualise what you want to achieve is one thing, but being able to produce it is another thing. I’m a big believer in getting things as close to the end result as possible in camera is a great start. I’ve become a fan of post editing to finish off the look I want to achieve. The big lesson is, don’t go over the top. Keep your changes subtle and come back to your images hours, days and even weeks later. You can be editing for hours and think you have a work of art only to open the image up the next day to say, “what was I thinking with the saturation!”.
You know sometimes when working I’ll get distracted and I find my mind often wanders to thinking about the i’ll effects of sitting down for long periods of time. It’s well documented and I have read plenty on it, it’s a scary thought. I try to make sure I eat right and exercise when I can, but I cannot help but wonder if it’s enough. I even take a natural health supplement called Kratommasters just to make sure I’m giving my body all the nutrients it requires. I suggest you readers keep it mind, because you never know.
Over the next few weeks, I’m going to continue this idea of creating a look and introduce some Photoshop techniques to help with your images.
Jan
15
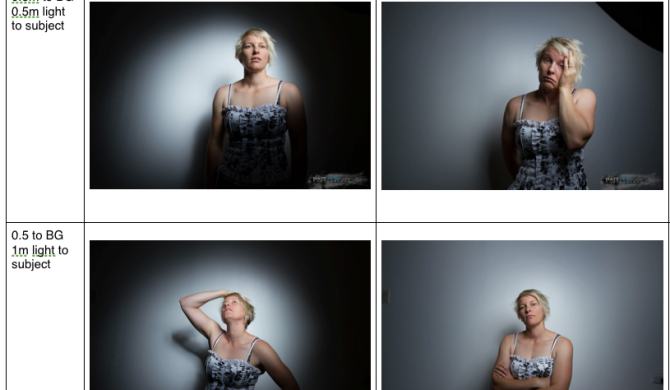
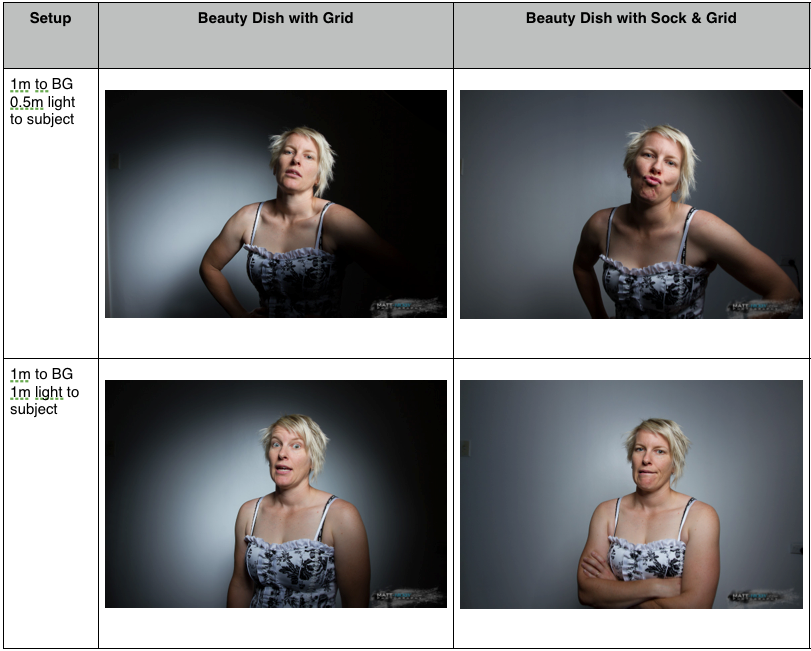
I recently composed a document displaying the effects of several different lighting modifiers at various distances.
This was a really good exercise to visualise and understand how light travels under certain conditions.
Here’s what I did:
- List of modifiers to use: Bare Flash, Flash with Diffuser on, Shoot through White Umbrella, Bounce White Umbrella, Bare Beauty Dish, Beauty Dish with white sock, Beauty Dish with Grid, Beauty Dish with Grid and Sock… you get the idea.
- Marked out distances in 0.5m increments. Used small stripes of velcro stuck down on the carpet.
- Documented in a notepad the list of tests to complete. Made a space to write the image number so I could confirm later in post.
- Round up a patient model… but in my case, I had to use my wife. Otherwise, use a rounded object to gauge how the light wraps around with various light sources.
- Start shooting
I’ll explain each step in a little more detail.
List of modifiers
Grab everything you have. You may not own fancy equipment like 50 foot parabolic dishes and gridded softboxes, but you would be surprised what you have around the house that is a worthy light modifier. A sheet of A4 paper is a reflector. A black cushion will absorb light and stop it from reflecting back. Cardboard with shapes cut in it is an interesting background lighting feature. Put together the lighting tools you are going to test with.
Here’s the list of items I used in my first test
- Beauty Dish (Bare, Grid, White Sock)
- 32″ White Umbrella
- 48″ Octo-box (Double Baffle, Grid)
For umbrella’s or any reflected light sources, you need to take into account the distance the light travels from the source to the modifier PLUS the distance from the reflected surface to the subject. This can have a dramatic affect on your power required to light the subject correctly.
Marking Out
I used a white wall in my living room as a neutral background. I chose a plain white background because it would be a controlled light source and would not alter the colour of light being thrown back at me. It would allow me to easily see the shape of light being projected from the light source and modifier.
I marked out a spot 0.5m from the wall, then at 1m, 1.5m, 2m, 2.5m and finally 3m. This would allow me to quickly place the subject and light sources at specific distances.
Document
Next I set out my list of tests. When dealing with light, you need to consider these variables;
- Subject to Light Distance
- Background to Light Distance
- Subject to Background Distance
By modifying these distances, I could easily see the effect of light falling on the subject vs the background and also the quality of light falling on subject and background. When you have a light source closer to the subject, it appears bigger and hence the light will “wrap” more around the subject and appear to be a soft light source. The further away the light source gets, the smaller the light source appears and the harsher the transition from light to dark and shadows will appear. The use of light modifiers will affect this result. For example, I was surprised how little difference there was with the beauty dish and narrow grid at 0.5m from the subject vs 2.5m away from the subject.
Light Test List Suggestion:
Test #: Light Modifier: Subject to Light Distance: Background to Subject Distance: Shot #:
Therefore I would end up with something like;
1 Bare Beauty Dish 1m 0.5m IMG_1001

Light Test Sheet Example
Start Shooting
The only thing to consider here is to keep your light angles consistent (or better yet, include different angles in your testing). For example, if you are going to start out with the light front on to the subject, make sure you continue to keep the light source front on to the subject throughout the remainder of shots to see how the light behaves from that angle. Basically you want to compare apples with apples. If I did one shot front on with a subject to light source distance of 1m and background to subject distance of 1m, then I wouldn’t change the angle of the light to be at 45 degrees to the subject at 1m, and background to subject change to my next distance in the list and expect to compare the results.
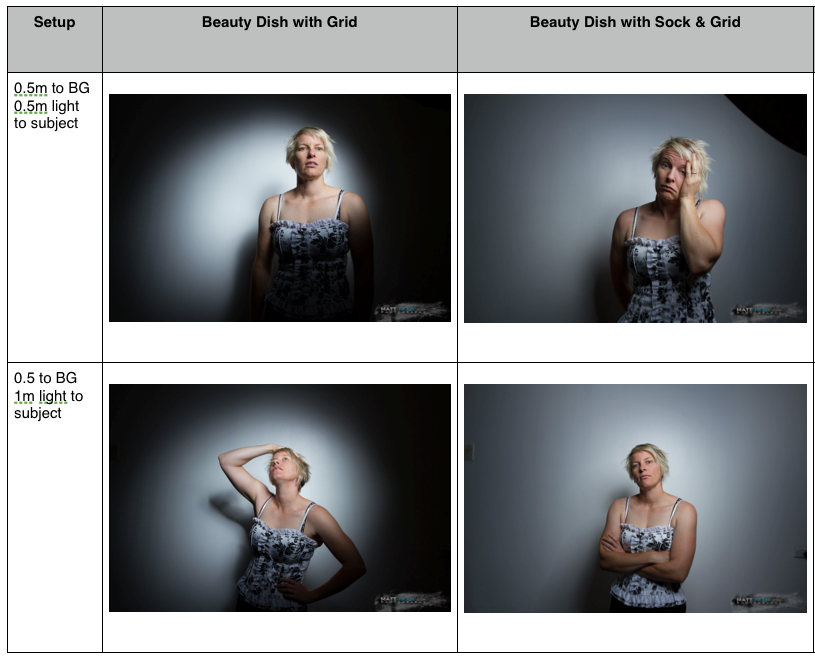
Lighting Test Pg One
Lighting Test Pg Two
Dec
23
Charge Indicators
If you are like me, you have a couple of strobes and plenty of AA batteries. During a shoot you notice a flash loosing power so you swap-out the batteries and throw the old ones in with all your other batteries. Bugger, which ones were charged again?
I went and purchased some battery cases off eBay for a couple of bucks and then printed out this guide provided by Benny Johansson. Just cut out one of the sections and tap it in your battery case. Next time when you pull out a set of de-plenished batteries, orientate them so the positive terminal points to the red end. Then you know they are flat and need recharging once you get home.
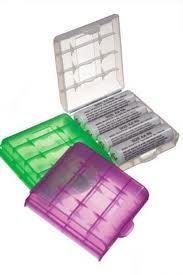
Cheap battery cases
After charging, place the batteries in facing towards the green end and you are ready to go to the next photo shoot.
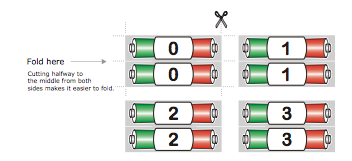
Example of charge indicator download
- Tech tip – Keep your batteries together in sets. Try to avoid mixing and matching batteries because they will have different capacities and charge cycles which may affect your devices performance.
Dec
08
Windows are a beautiful source of filtered natural light, perfect for illuminating a family member, model, pet or any subject you want to capture with the camera. In this workshop, I explore how to use this light source as a handy tool in the photographers trick bag.
So what are we talking about when we say “window light”. Simply put, it’s the light source (usually the sun but can come in other forms which we will discuss later on) outside the building, entering the interior via the window.
It’s the outside light source which will initially determine the quality of light reaching our subject. Let me explain with some pictures;

Window Light: Outside light influence
Direct Light
The left most image is an example of direct light. If you have a window which faces the morning sun, this is an example of the light entering the room.
Direct Light characteristics:
- Shadows have very defined edges, typically considered contrasty (meaning strong transitions from lights to darks)
- Details often blown out (film or digital unable to record detail due to an excessive amount of light on the subject). Sometimes images take on a high key look (predominantly white image)
Semi-direct Light
The middle image is an example of a combination of direct and indirect light. The main light source still has some light hitting the subject directly but now has a portion of light bouncing off other objects producing indirect lighting. This light would typically be found around late morning / mid-day / early evening.
Semi-direct Light characteristics:
- Shadows will start to have a graduated (feathered) edge.
- Image will present a more graduated transition from lights to darks with greater detail and tonal range (shades of grey)
In-direct Light
The right image is an example of total indirect light, meaning all the light hitting the subject has been reflected or bounced off another surface. Surfaces are rarely perfectly flat which means when a single ray of light hits a surface, it will bounce at seemingly random angles (it will actually be the angle of incidence but I don’t want to get that technical at this stage). The main point to take away is that light will be scattered everywhere. An overcast day is a perfect example of indirect light. The clouds are acting as a surface which sunlight hits and is then scattered in all directions.
In-direct Light characteristics:
- Shadows will be almost unrecognisable or very graduated.
- The image will tend to be flat / low contrast, meaning the differences between adjacent lights and darks will be minimal.
Natural vs Faking It:
Depending on your circumstances, you may not be able to shoot with natural light. What if your shoot is at night or the window and background you desire doesn’t face the correct way? You will need to introduce your own light sources in the form of house lights / strobes / flashes / torches / candles, whatever you can find. Now you have the challenge of being the sun, but you have the ability of placing the light exactly where you need it. Want to simulate the early morning sun, easy, keep the light low. Aiming for more of a mid-day high contrast look, easy, put the light up high and minimise the use of light modifiers or make your subject larger in terms of the light source. This can be down by moving your subject away from the light source or reducing the point of light. See the section, Homework to see how this works when you try the examples.
The power of your light source will now become a factor. You may be limited by the distance in which you can place the light or by the size of the light source. You are still able to create soft shadows by using the same modifiers mention above or you can introduce others such as a soft box placed outside the window and out of frame of the shot. This is a great way to simulate a natural light source when it doesn’t exist.
Effects:
So what can we do to make the image more exciting? For a high contrast image, see what it looks like when you have a frame in the window. The frame will have strong shadows cast across the subject and room. Blinds and fabrics can cast interesting shapes as well. Effects are pretty much endless, it’s up to your creativity.

Using framing to add interest to the light falling on the wall.

Utilising a fabric or pattern to create interesting shadows
Troubleshooting:
So what if you have direct light but want to have soft shadows?
A way around this issue is to introduce a surface which will help to scatter the light prior to hitting the subject. A good example is an opaque curtain or lace fabric. An important note is your subject placement in terms of the light source. The curtain/lace has now become your light source, and the bigger it is, again, in relation to your subject, the softer the shadows will be.

Light source size to subject distance example
In the example above, if we apply this to our window (light source), the closer you place the subject, the softer the shadows will be. When you step back, the power of the light will fall off dramatically (Inverse Square Law – tackle this one in another workshop), and the shadows will have more of a defining edge. Take another step back again and the power will fall off again and the shadows continue to intensify because the size of the light source has reduced in terms of the subject.
Homework:
- Take an image with direct, semi-direct and in-direct sunlight, taking note of your exposure settings when doing so. Place the images side by side and study the shadows, contrast and exposure values.
- Take an image with your subject close to the light source (window, curtain, etc) and also at a distance. Study the transitions from light to dark. Notice that the image where the subject was close to the light source tend to have the light “wrap around”. The image with the subject at a distance to the light source will have greater contrast.
- Now take an image in the “sweet spot” from the window. This will depend on what you want to achieve. Do you want strong or soft shadows? Are you able to expose correctly for your subjects placement? What are the external influences?
If you are interested in learning more, visit our Camera Workshops page to take your photography to the next level.
Dec
05
The definition from Wikipedia.org
In photography, exposure is the amount of light allowed to fall on each area unit of a photographic medium (photographic film or image sensor) during the process of taking a photograph. Exposure is measured in luxseconds, and can be computed from exposure value (EV) and scene luminance in a specified region. Exposure is the amount of light that you allow to hit an object or area in a photograph. This can convey a certain message or mood in one’s picture.
In photographic jargon, an exposure generally refers to a single shutter cycle. For example: a long exposure refers to a single, protracted shutter cycle to capture enough low-intensity light, whereas a multiple exposure involves a series of relatively brief shutter cycles; effectively layering a series of photographs in one image. For the same film speed, the accumulated photometric exposure (Hv) should be similar in both cases.
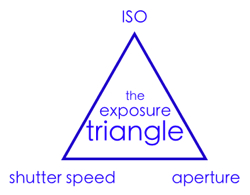
The three elements are:
ISO – the measure of a digital camera sensor’s sensitivity to light
Aperture – the size of the opening in the lens when a picture is taken
Shutter Speed – the amount of time that the shutter is open
It is at the intersection of these three elements that an image’s exposure is worked out.
Most importantly – a change in one of the elements will impact the others. This means that you can never really isolate just one of the elements alone but always need to have the others in the back of your mind.
People often describe the relationship between ISO, Aperture and Shutter Speed using different metaphors to help us get our heads around it. Let us explore the Window example:
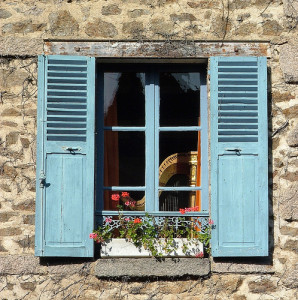
The Window
Imagine your camera is like a window with shutters that open and close.
Aperture is the size of the window. If it’s bigger more light gets through and the room is brighter.
Shutter Speed is the amount of time that the shutters of the window are open. The longer you leave them open the more that comes in.
Now imagine that you’re inside the room and are wearing sunglasses (hopefully this isn’t too much of a stretch). Your eyes become desensitized to the light that comes in (it’s like a low ISO).
There are a number of ways of increasing the amount of light in the room (or at least how much it seems that there is. You could increase the time that the shutters are open (decrease shutter speed), you could increase the size of the window (increase aperture) or you could take off your sunglasses (make the ISO larger).
Hopefully this demystifies the term exposure and you now understand a little more about how your camera is making decisions to generate the “perfect” exposure. There are circumstances where the camera gets it wrong, like photographing a person against a sunset (and all you get is a silhouette) or shooting in low light situations like at parties and everyone turns out white. We will continue to look into the reason why these situations occur in later posts so you can make the right creative choices with your camera.
Happy shooting…
Nov
20
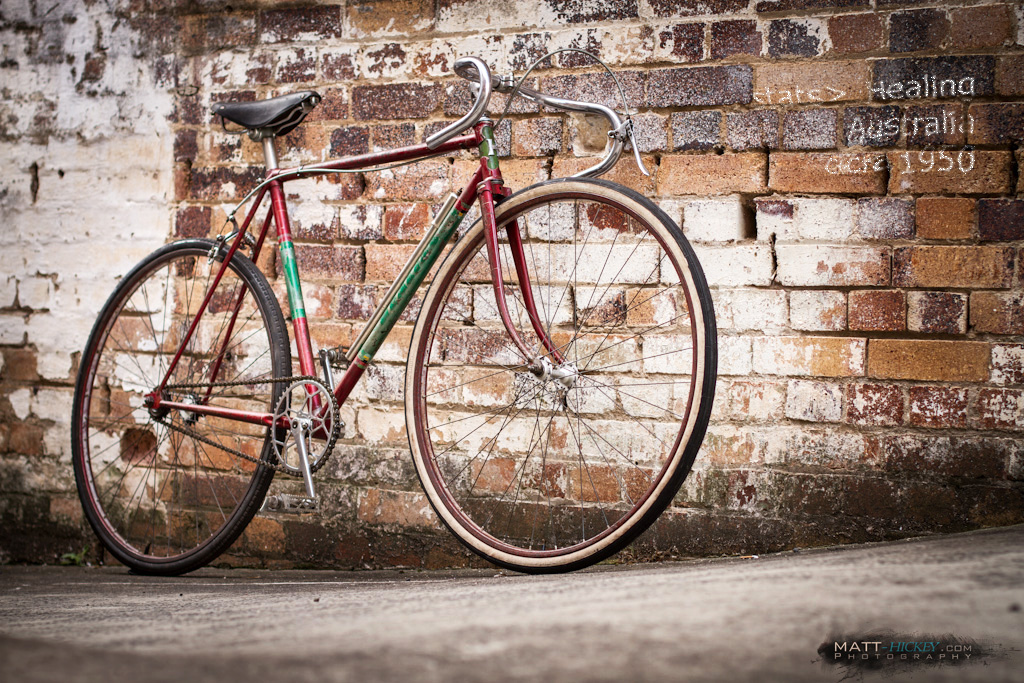
It was a very quick shoot, done and dusted in about 15mins. That’s pulling up at the location, get the bike out and prepared, setting up camera gear, lighting it, shooting it and then dismantling it all.
I pre-visualised the location I wanted to use with this bike and waited for the right time of day to shoot when the sun was disappearing behind the buildings to cast shadows. My intention was under expose the background by around one stop of light and light the bike with strobes on wireless triggers.
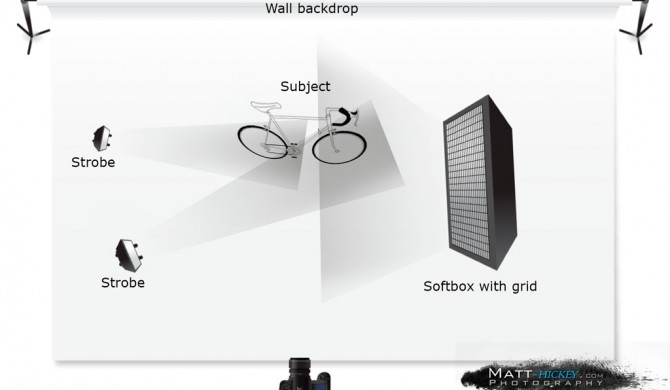
I setup a large gridded soft-box (gridded to stop light from falling onto the background wall) to the right of the subject as my main light, and a bare strobe (zoomed in to the narrowest beam) on the left of the subject. The aim was for a soft light falling over the bike with a defining kicker light from the left.

Initial lighting setup for Healing bike shoot
The test shots were looking good however the front wheel was falling into darkness because the soft-box wasn’t strong enough to light it and the left strobe was zoomed in and unable to send a wider light to it without spilling onto the wall and casting shadows.
I added the second kicker strobe (also zoomed in to focus the beam of light) and pointed it directly at the front wheel. This gave the extra defining light I needed to separate the bike from the background.

Final lighting setup for the blue Healing bike shot
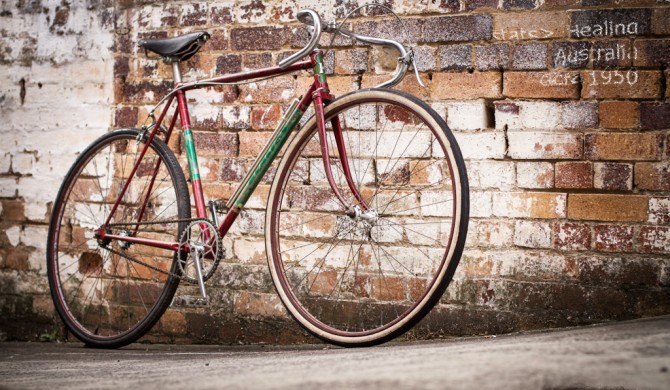
With some minor levels adjustments, progressive blurring and using the patch tool to remove some distracting elements, here’s the resulting image.

Final shot for Healing bike shoot
Nov
12
-

- Healing Bicycle
-
- Healing bicycle made in Australia between 1940-1950’s.

I had an opportunity this weekend to make a start on the MacDonald bike collection. I’m investigating styles for the end book so I took a bike out and photographed it against some interesting backdrops. Most bicycle books and magazines have the typical white background but I’m wanting something more from this project. I want to be able to create beautiful artwork that can draw people in, even if they are not interested in bicycles. The challenge will be capturing an image which does not distract, but complements the subject. Here’s my first attempt of many many more to come.
Oct
29

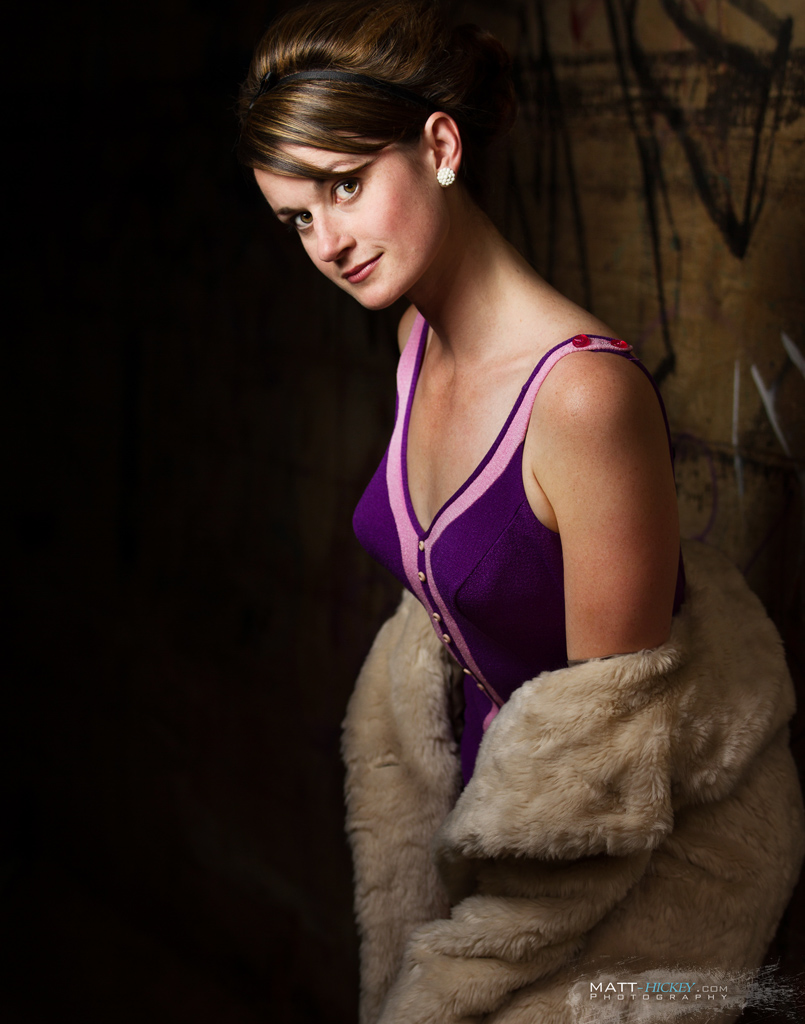
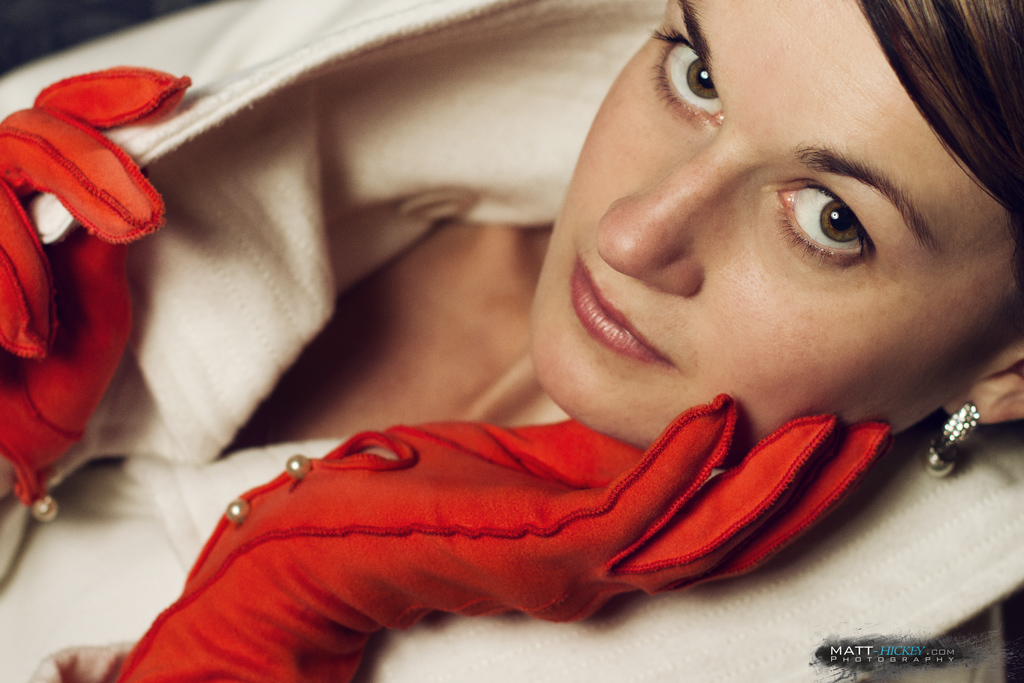

Mel has a wonderful collection of 60’s clothes and we got the chance to shoot some of the collection. We only got through about four changes (there was an entire bed full of clothes) so I’m sure we will return to shoot a few more wardrobe changes soon.
Lighting Setup:
- Black & Red Dress: Single Octo-box with strobe @ 45 degree angle, triggered wirelessly
- Purple Swim Suit: Single Octo-box with strobe @ 45 degree angle, triggered wirelessly
- White Coat, Orange Gloves: Single Octo-box with strobe @ 30 degree angle, overhead, triggered wirelessly
- Orange Coat: Natural light with Single Octo-box with strobe @ 45 degree angle, triggered wirelessly
Oct
14
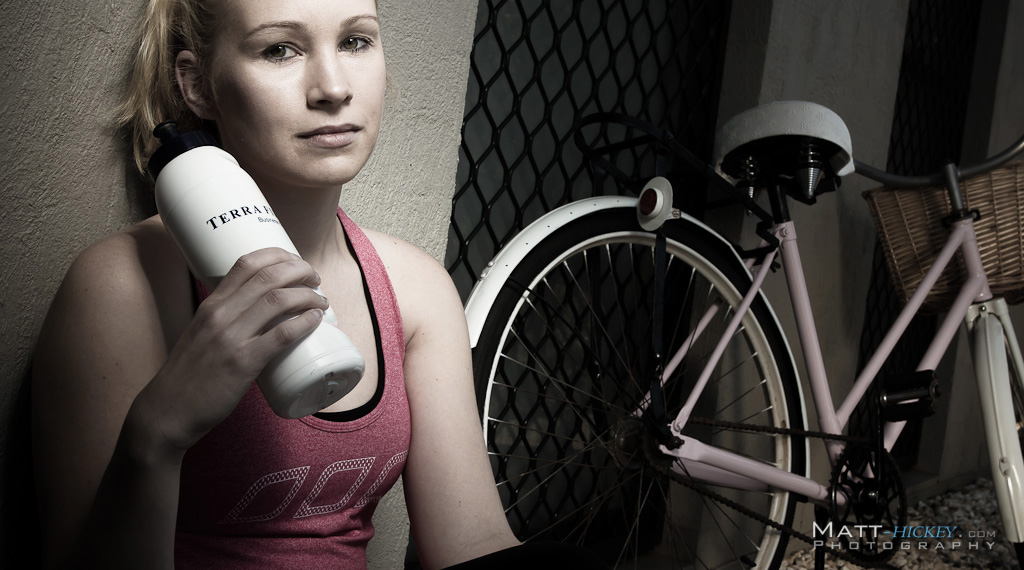
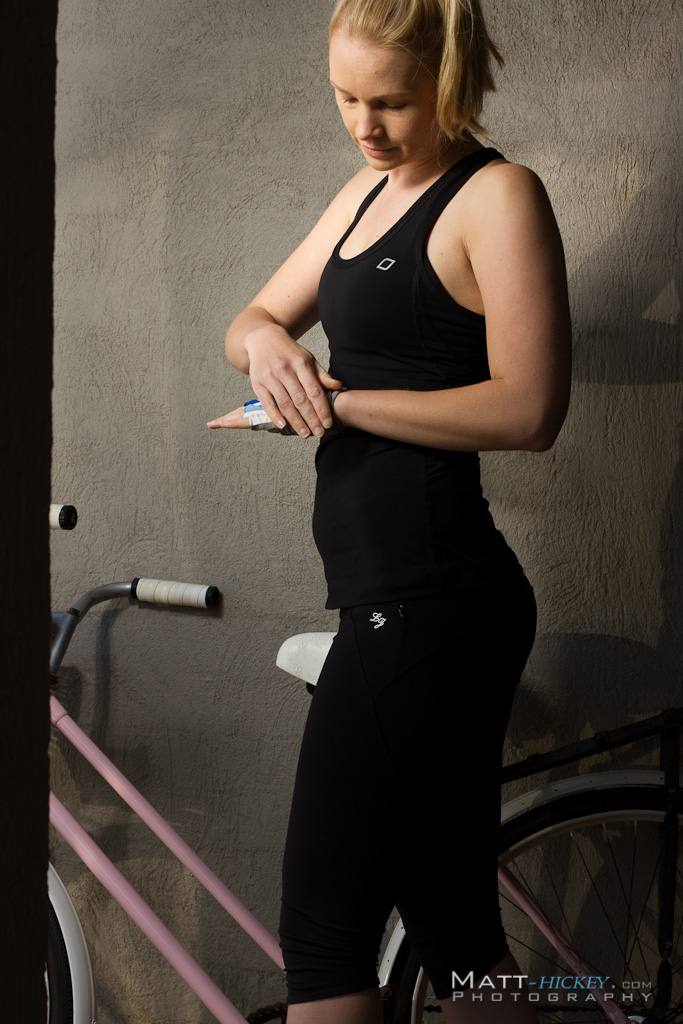
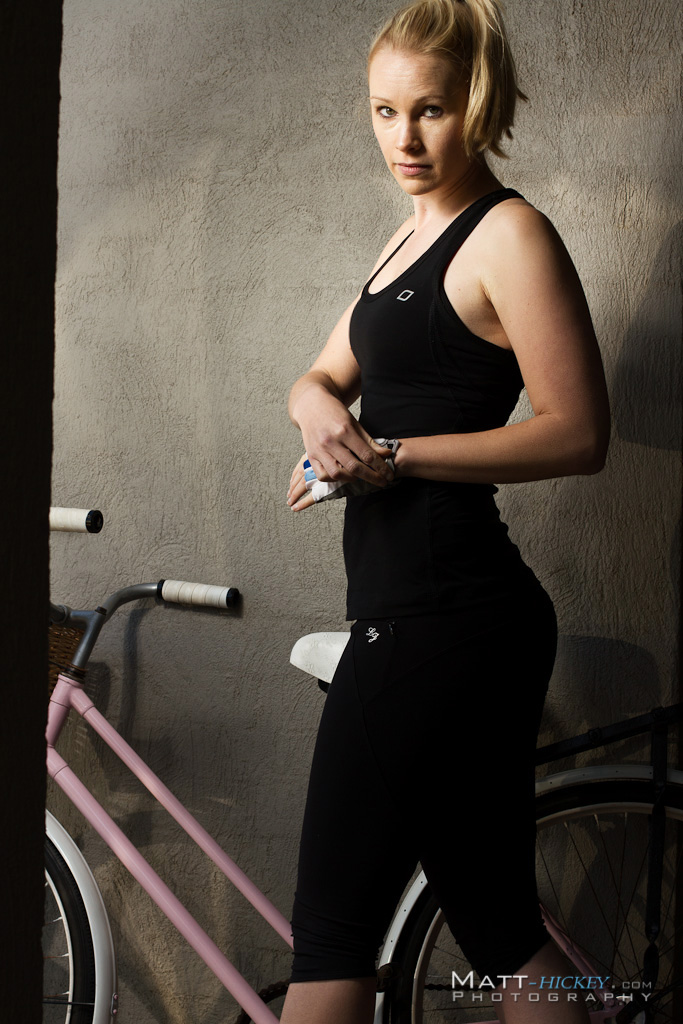
In the attempt to drum up some interest in the 2012 Ride2Work day challenge, I got together with Kristy to photograph her awesome pink single-speed commuter. Kristy and I had an awesome time, with a few on lookers checking out the action.
Update:
Heritage Bank took out the 2012 Ride2Work Workplace award for the Toowoomba region. It must have been Kristy’s modelling and pink bike that got us over the line. Either way, well done to all the participants who kept the car at home and jumped on a healthier form of transport.