19
New article on preparing images and how to use the High Pass sharpen filter. Hope you enjoy the new format.
Regards,
Matt Hickey
08
Windows are a beautiful source of filtered natural light, perfect for illuminating a family member, model, pet or any subject you want to capture with the camera. In this workshop, I explore how to use this light source as a handy tool in the photographers trick bag.
So what are we talking about when we say “window light”. Simply put, it’s the light source (usually the sun but can come in other forms which we will discuss later on) outside the building, entering the interior via the window.
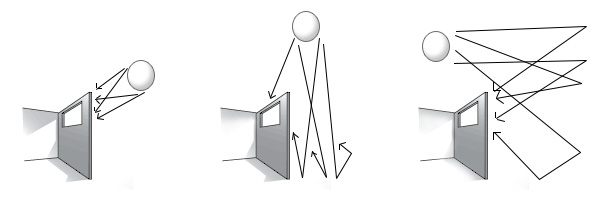
It’s the outside light source which will initially determine the quality of light reaching our subject. Let me explain with some pictures;
Window Light: Outside light influence
Direct Light
The left most image is an example of direct light. If you have a window which faces the morning sun, this is an example of the light entering the room.
Direct Light characteristics:
- Shadows have very defined edges, typically considered contrasty (meaning strong transitions from lights to darks)
- Details often blown out (film or digital unable to record detail due to an excessive amount of light on the subject). Sometimes images take on a high key look (predominantly white image)
Semi-direct Light
The middle image is an example of a combination of direct and indirect light. The main light source still has some light hitting the subject directly but now has a portion of light bouncing off other objects producing indirect lighting. This light would typically be found around late morning / mid-day / early evening.
Semi-direct Light characteristics:
- Shadows will start to have a graduated (feathered) edge.
- Image will present a more graduated transition from lights to darks with greater detail and tonal range (shades of grey)
In-direct Light
The right image is an example of total indirect light, meaning all the light hitting the subject has been reflected or bounced off another surface. Surfaces are rarely perfectly flat which means when a single ray of light hits a surface, it will bounce at seemingly random angles (it will actually be the angle of incidence but I don’t want to get that technical at this stage). The main point to take away is that light will be scattered everywhere. An overcast day is a perfect example of indirect light. The clouds are acting as a surface which sunlight hits and is then scattered in all directions.
In-direct Light characteristics:
- Shadows will be almost unrecognisable or very graduated.
- The image will tend to be flat / low contrast, meaning the differences between adjacent lights and darks will be minimal.
Natural vs Faking It:
Depending on your circumstances, you may not be able to shoot with natural light. What if your shoot is at night or the window and background you desire doesn’t face the correct way? You will need to introduce your own light sources in the form of house lights / strobes / flashes / torches / candles, whatever you can find. Now you have the challenge of being the sun, but you have the ability of placing the light exactly where you need it. Want to simulate the early morning sun, easy, keep the light low. Aiming for more of a mid-day high contrast look, easy, put the light up high and minimise the use of light modifiers or make your subject larger in terms of the light source. This can be down by moving your subject away from the light source or reducing the point of light. See the section, Homework to see how this works when you try the examples.
The power of your light source will now become a factor. You may be limited by the distance in which you can place the light or by the size of the light source. You are still able to create soft shadows by using the same modifiers mention above or you can introduce others such as a soft box placed outside the window and out of frame of the shot. This is a great way to simulate a natural light source when it doesn’t exist.
Effects:
So what can we do to make the image more exciting? For a high contrast image, see what it looks like when you have a frame in the window. The frame will have strong shadows cast across the subject and room. Blinds and fabrics can cast interesting shapes as well. Effects are pretty much endless, it’s up to your creativity.
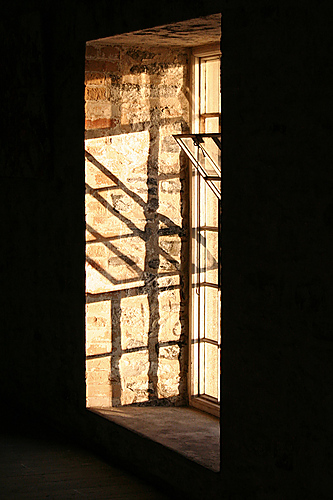
Using framing to add interest to the light falling on the wall.
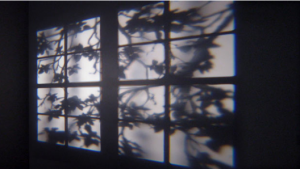
Utilising a fabric or pattern to create interesting shadows
Troubleshooting:
So what if you have direct light but want to have soft shadows?
A way around this issue is to introduce a surface which will help to scatter the light prior to hitting the subject. A good example is an opaque curtain or lace fabric. An important note is your subject placement in terms of the light source. The curtain/lace has now become your light source, and the bigger it is, again, in relation to your subject, the softer the shadows will be.
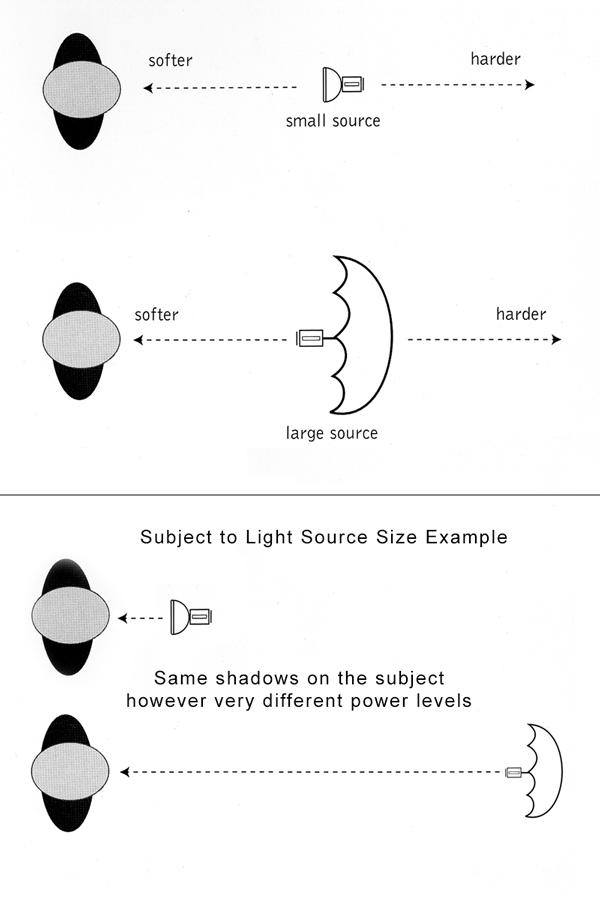
Light source size to subject distance example
In the example above, if we apply this to our window (light source), the closer you place the subject, the softer the shadows will be. When you step back, the power of the light will fall off dramatically (Inverse Square Law – tackle this one in another workshop), and the shadows will have more of a defining edge. Take another step back again and the power will fall off again and the shadows continue to intensify because the size of the light source has reduced in terms of the subject.
Homework:
- Take an image with direct, semi-direct and in-direct sunlight, taking note of your exposure settings when doing so. Place the images side by side and study the shadows, contrast and exposure values.
- Take an image with your subject close to the light source (window, curtain, etc) and also at a distance. Study the transitions from light to dark. Notice that the image where the subject was close to the light source tend to have the light “wrap around”. The image with the subject at a distance to the light source will have greater contrast.
- Now take an image in the “sweet spot” from the window. This will depend on what you want to achieve. Do you want strong or soft shadows? Are you able to expose correctly for your subjects placement? What are the external influences?
If you are interested in learning more, visit our Camera Workshops page to take your photography to the next level.
05
The definition from Wikipedia.org
In photography, exposure is the amount of light allowed to fall on each area unit of a photographic medium (photographic film or image sensor) during the process of taking a photograph. Exposure is measured in luxseconds, and can be computed from exposure value (EV) and scene luminance in a specified region. Exposure is the amount of light that you allow to hit an object or area in a photograph. This can convey a certain message or mood in one’s picture.
In photographic jargon, an exposure generally refers to a single shutter cycle. For example: a long exposure refers to a single, protracted shutter cycle to capture enough low-intensity light, whereas a multiple exposure involves a series of relatively brief shutter cycles; effectively layering a series of photographs in one image. For the same film speed, the accumulated photometric exposure (Hv) should be similar in both cases.
The three elements are:
ISO – the measure of a digital camera sensor’s sensitivity to light
Aperture – the size of the opening in the lens when a picture is taken
Shutter Speed – the amount of time that the shutter is open
It is at the intersection of these three elements that an image’s exposure is worked out.
Most importantly – a change in one of the elements will impact the others. This means that you can never really isolate just one of the elements alone but always need to have the others in the back of your mind.
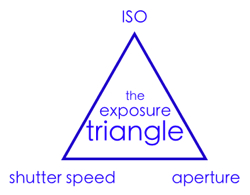
People often describe the relationship between ISO, Aperture and Shutter Speed using different metaphors to help us get our heads around it. Let us explore the Window example:
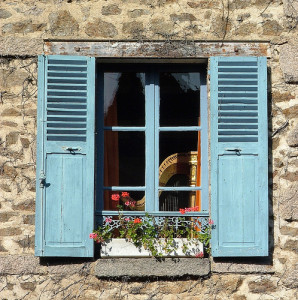
The Window
Imagine your camera is like a window with shutters that open and close.
Aperture is the size of the window. If it’s bigger more light gets through and the room is brighter.
Shutter Speed is the amount of time that the shutters of the window are open. The longer you leave them open the more that comes in.
Now imagine that you’re inside the room and are wearing sunglasses (hopefully this isn’t too much of a stretch). Your eyes become desensitized to the light that comes in (it’s like a low ISO).
There are a number of ways of increasing the amount of light in the room (or at least how much it seems that there is. You could increase the time that the shutters are open (decrease shutter speed), you could increase the size of the window (increase aperture) or you could take off your sunglasses (make the ISO larger).
Hopefully this demystifies the term exposure and you now understand a little more about how your camera is making decisions to generate the “perfect” exposure. There are circumstances where the camera gets it wrong, like photographing a person against a sunset (and all you get is a silhouette) or shooting in low light situations like at parties and everyone turns out white. We will continue to look into the reason why these situations occur in later posts so you can make the right creative choices with your camera.
Happy shooting…
