15
2013Workshop: Creating Light
I recently composed a document displaying the effects of several different lighting modifiers at various distances.
This was a really good exercise to visualise and understand how light travels under certain conditions.
Here’s what I did:
- List of modifiers to use: Bare Flash, Flash with Diffuser on, Shoot through White Umbrella, Bounce White Umbrella, Bare Beauty Dish, Beauty Dish with white sock, Beauty Dish with Grid, Beauty Dish with Grid and Sock… you get the idea.
- Marked out distances in 0.5m increments. Used small stripes of velcro stuck down on the carpet.
- Documented in a notepad the list of tests to complete. Made a space to write the image number so I could confirm later in post.
- Round up a patient model… but in my case, I had to use my wife. Otherwise, use a rounded object to gauge how the light wraps around with various light sources.
- Start shooting
I’ll explain each step in a little more detail.
List of modifiers
Grab everything you have. You may not own fancy equipment like 50 foot parabolic dishes and gridded softboxes, but you would be surprised what you have around the house that is a worthy light modifier. A sheet of A4 paper is a reflector. A black cushion will absorb light and stop it from reflecting back. Cardboard with shapes cut in it is an interesting background lighting feature. Put together the lighting tools you are going to test with.
Here’s the list of items I used in my first test
- Beauty Dish (Bare, Grid, White Sock)
- 32″ White Umbrella
- 48″ Octo-box (Double Baffle, Grid)
Marking Out
I used a white wall in my living room as a neutral background. I chose a plain white background because it would be a controlled light source and would not alter the colour of light being thrown back at me. It would allow me to easily see the shape of light being projected from the light source and modifier.
I marked out a spot 0.5m from the wall, then at 1m, 1.5m, 2m, 2.5m and finally 3m. This would allow me to quickly place the subject and light sources at specific distances.
Document
Next I set out my list of tests. When dealing with light, you need to consider these variables;
- Subject to Light Distance
- Background to Light Distance
- Subject to Background Distance
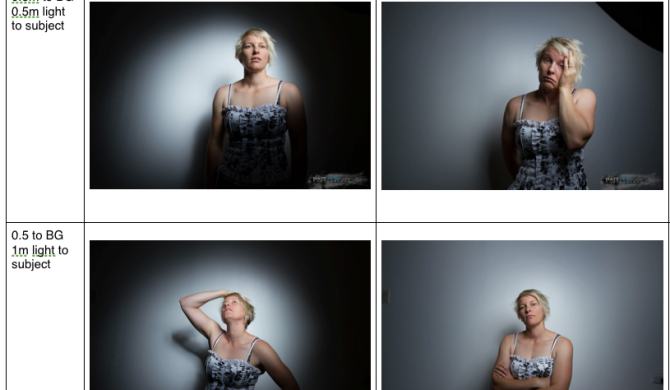
By modifying these distances, I could easily see the effect of light falling on the subject vs the background and also the quality of light falling on subject and background. When you have a light source closer to the subject, it appears bigger and hence the light will “wrap” more around the subject and appear to be a soft light source. The further away the light source gets, the smaller the light source appears and the harsher the transition from light to dark and shadows will appear. The use of light modifiers will affect this result. For example, I was surprised how little difference there was with the beauty dish and narrow grid at 0.5m from the subject vs 2.5m away from the subject.
Light Test List Suggestion:
Test #: Light Modifier: Subject to Light Distance: Background to Subject Distance: Shot #:
Therefore I would end up with something like;
1 Bare Beauty Dish 1m 0.5m IMG_1001
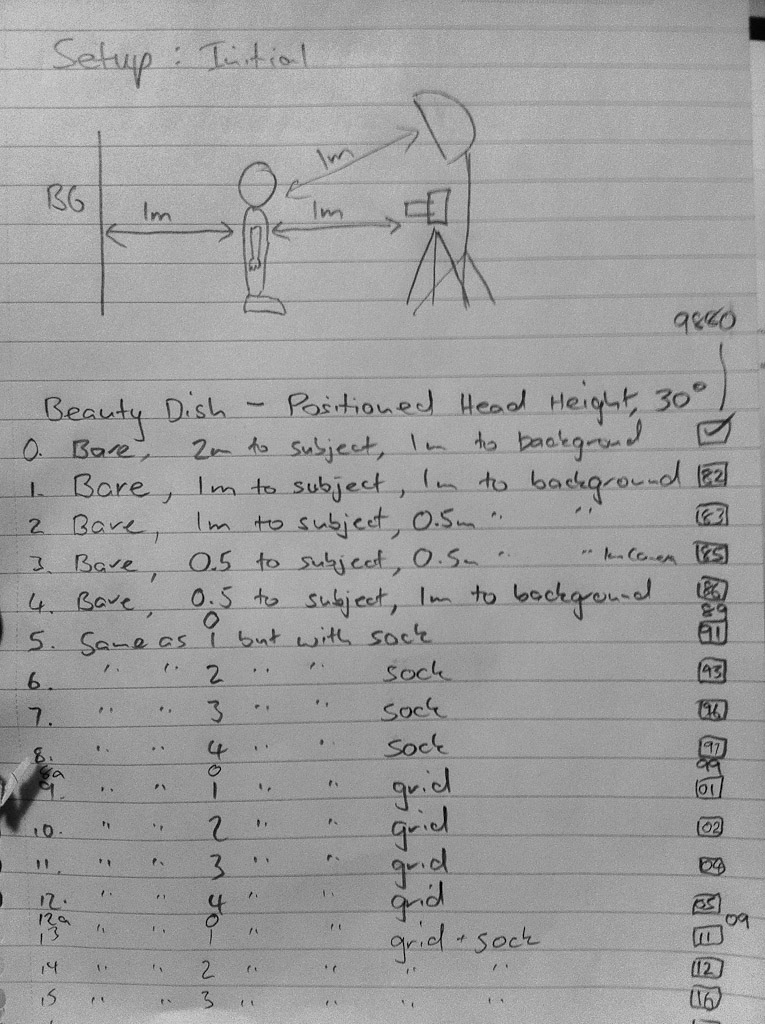
Light Test Sheet Example
Start Shooting
The only thing to consider here is to keep your light angles consistent (or better yet, include different angles in your testing). For example, if you are going to start out with the light front on to the subject, make sure you continue to keep the light source front on to the subject throughout the remainder of shots to see how the light behaves from that angle. Basically you want to compare apples with apples. If I did one shot front on with a subject to light source distance of 1m and background to subject distance of 1m, then I wouldn’t change the angle of the light to be at 45 degrees to the subject at 1m, and background to subject change to my next distance in the list and expect to compare the results.
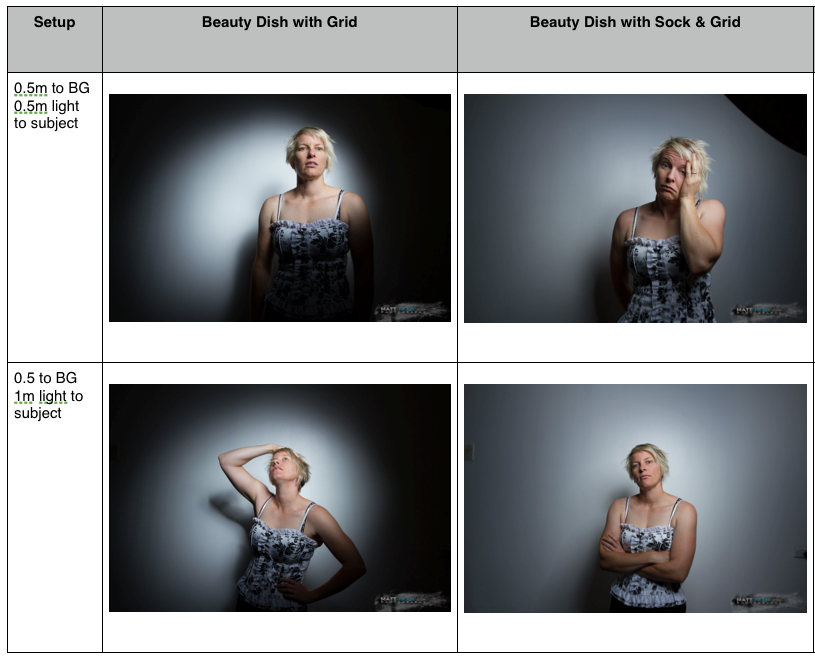
Lighting Test Pg One
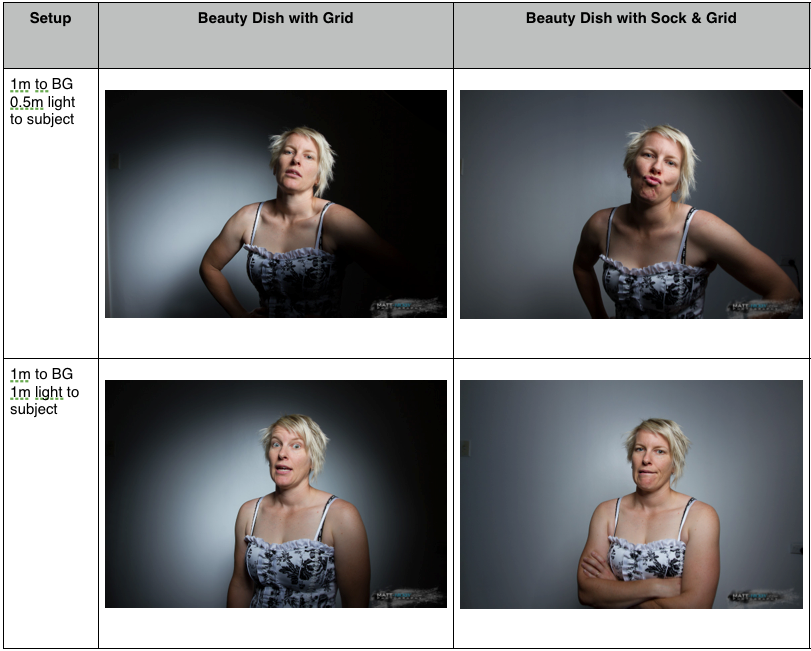
Lighting Test Pg Two
